The simplest complete moving average trading strategy: one entry condition and three ways out. If
you have never written a trading strategy before, start here rather than with something clever. It
does one thing, and it has every required part.
1. The rule
# BUY — price above a moving average
if Price > Sma(60):
    Buy()
# SELL — take profit, stop loss, time exit
if ProfitPct >= 2.0 or ProfitPct <= -1.0 or HoldTime >= 900:
Sell()
You do not need a re-entry guard line here. With split buy count at 1 — the default — the engine
does not evaluate the BUY block at all while you hold a position, so the condition staying true
cannot stack another entry on top. Spend that attention on the exit instead. The numbers are
placeholders; the structure is the point.
2. Why this is the baseline
Every element here is required, not optional.
Part
What happens without it
Entry condition
Nothing to trade.
Profit target
A winner gives everything back.
Stop loss
One bad day undoes a month.
Time exit
A trade that goes nowhere holds a slot forever.
That last one is the part beginners leave out and it costs the most, because it is invisible. A
position that neither wins nor loses is still occupying capacity you could have used.
Anything more complicated you write later has to beat this. Most of the time it will not.
3. When it fails
Price > Sma(60) is true for as long as price stays above the average, so this enters on the
hundredth tick as readily as the first. It has no concept of a crossing — see
moving average crossover strategy with a real crossing test
for the version that does.
It will also enter on names with no liquidity and no volume, because nothing here looks at either.
4. What the round trip asks of it
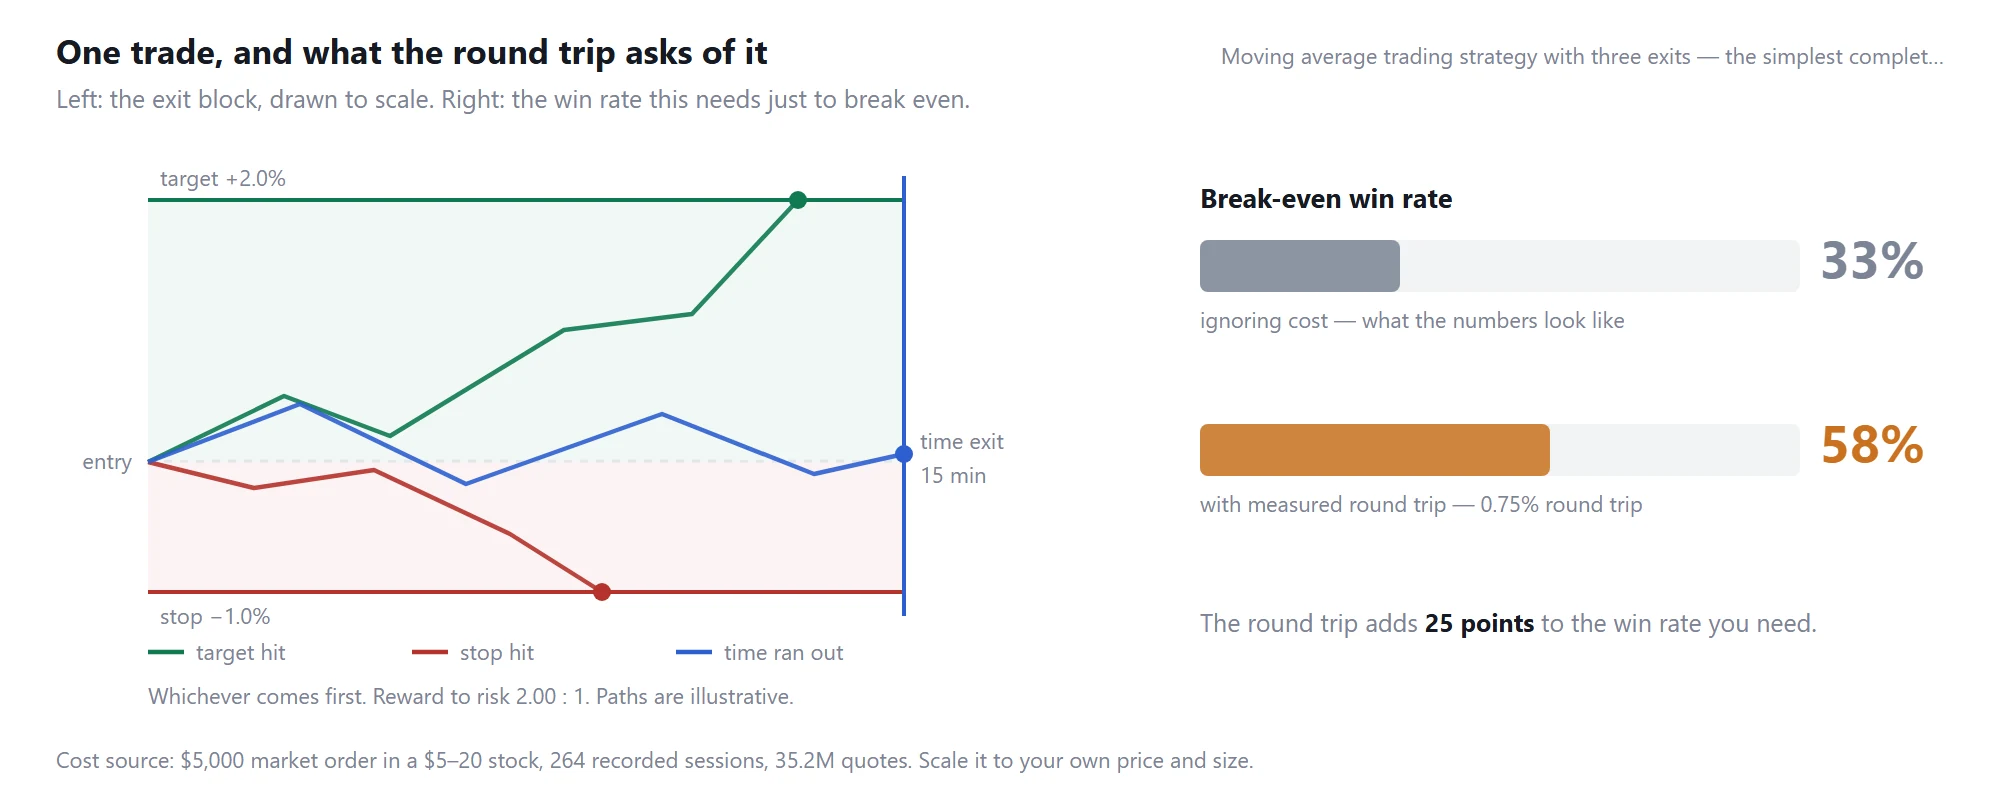
Moving average with three exits: the exit block drawn to scale, and the break-even win rate before and after measured trading costs
The 2.0% target against a 1.0% stop needs a 33% win rate on paper. With our measured round trip of
about 0.75% it needs 58%.
That 25-point gap is the single most useful number for a beginner to internalise, because it does
not depend on your entry being clever. It applies to every strategy on this site. It is also why a
2% target survives contact with reality and a 0.5% target usually does not: the cost is fixed, so
the bigger the target, the smaller the share it takes.
5. What to change first
Add one condition at a time and record the trade count each time. Liquidity first
(DayAmount > 5000000), then a spread check, then the crossing form of the entry.
If a change improves the result and cuts trade count by ninety percent, you have not improved the
strategy — you have made it rarer, and you have far less evidence than you had before. Run each
version against your own recordings:
how to backtest a day trading strategy on US stocks.
Educational template for research and backtesting. Not investment advice and not a signal service.
Originally published by TraderWe on August 6, 2026. You may quote and link to this page. Republishing the full text without a link back to the original is not permitted.